Welcome to WordPress. This is your first post. Edit or delete it, then start writing!
Author: abduraibi@gmail.com
-
AI Tools for Everyday Productivity: Work Smarter in 2025
Productivity in 2025 isn’t about working harder — it’s about working smarter. Artificial intelligence (AI) has moved from niche enterprise tools to everyday assistants that help us manage time, automate repetitive jobs, write and edit faster, and keep focus when it matters most. This article walks through the best AI tools you can use right now, demonstrates how to integrate them into daily routines, and gives practical steps to pick the right tool for your needs. Whether you’re a physician juggling shifts, a student managing deadlines, or an entrepreneur building a side hustle, the right AI setup will save hours every week.
Why AI Is Now a Core Productivity Tool
AI moved quickly from experimental features to essential workflow helpers. Modern AI does three things well for productivity: (1) it reduces friction in routine tasks, (2) it helps prioritize your time, and (3) it augments creative and decision-making tasks. Search interest for “AI productivity tools” and “AI assistant apps” surged globally in 2024–25, and for good reason: these solutions deliver small, compounding time savings that free up cognitive space for higher-value work.
Time Management and Intelligent Scheduling
Meeting overload and scattered calendars are productivity killers. AI scheduling assistants analyze your calendar, preferred focus windows, task priorities, and travel time to create an optimized week.
- Use Motion or Reclaim AI to automatically allocate focus blocks and reschedule low-priority meetings.
- Practical setup: head to your calendar app, connect Motion/Reclaim, set your “deep focus” hours (e.g., 09:00–11:00), and let the AI protect those blocks.
- Time Management Example: A medical resident using Reclaim AI to auto-reschedule study sessions around unpredictable shifts.
- Best Productivity Apps 2025
Writing, Communication & Content Drafting
AI writing assistants are more than grammar checkers now — they help craft tone, adapt to audiences, and draft initial content that you polish.
- Use GrammarlyGO for tone-aware rewriting, and Jasper for longer content drafts or ad copy.
- How to use: paste your rough draft into GrammarlyGO for clarity + concision suggestions, then use Jasper for generating bullet-point drafts or alternatives when stuck.
- Example workflow: draft a clinical note or patient advice paragraph, run it through GrammarlyGO to simplify language, and then create a companion social post using Jasper.
- Writing Example: A content creator drafting LinkedIn posts with Jasper, then polishing with GrammarlyGO.

Task Automation: Connect Apps, Reduce Busywork
Connecting apps is one of the highest ROI productivity strategies — especially when AI can trigger conditional workflows.
- Use Zapier or IFTTT to convert incoming emails into tasks, copy attachments to cloud drives, or notify team channels automatically.
- Example automation: create a Zap that turns flagged emails into a Trello card with the due date pulled from the email subject.
- Automation Example: A small business automating invoice management with Zapier, reducing manual admin work by 5 hours per week.
- 50/30/20 Rule

Focus & Distraction Management
AI can help you protect attention without heavy-handed blocking. Modern tools analyze behavior and guide you into healthier focus patterns.
- Practical tip: use AI insights to set realistic daily focus targets (e.g., 3–4 high-concentration hours) rather than arbitrarily blocking long chunks that fail.
- Try RescueTime to measure productive time and Freedom to block distractions when focus time is scheduled. These apps now include AI-driven recommendations for focus windows based on your peak performance times.
- Focus Example: A student preparing for exams using RescueTime to block TikTok during revision hours.
AI in Collaboration & Teamwork
AI isn’t just personal — teams are using it to streamline group work.
- AI Meeting Summaries: Tools like Fireflies.ai and Otter.ai transcribe meetings and highlight action items instantly.
- Team Communication: Slack’s new AI suggests responses, drafts announcements, and detects when information is being repeated unnecessarily.
- Benefit: Teams waste less time on long recaps, and new members get caught up quickly.
Image placement suggestion (optional 4th inside): A team video call with AI summarizing tasks on the side.
Alt: “AI assistant generating instant meeting notes during a video conference.”Learning and Micro-Upskilling
AI personalizes learning, making micro-skills acquisition faster and more effective.
- Platforms like Coursera now include AI mentors and personalized learning paths; Duolingo Max uses GPT-level engines to create dynamic practice conversations.
- How to implement: set aside two 20–30 minute slots per week using an AI learning plan that adapts to your retained progress.
Practical Setup: A Step-by-Step Starter Plan (for busy professionals)
- Audit your pain points (30 minutes): time leaks, frequent interruptions, repetitive tasks.
- Start with scheduling: connect Motion or Reclaim and define 2–3 focus blocks per week.
- Automate the simplest repeatable task with Zapier (e.g., save invoice attachments automatically).
- Add writing assistance (GrammarlyGO) for patient letters or email templates.
- Measure & adjust: use RescueTime monthly reports; adjust focus windows and automations.
This incremental approach keeps adoption low-friction and ensures the AI tools actually save you time.
Risks & Ethical Considerations
AI is powerful, but not flawless. Be mindful of data privacy when connecting tools, and avoid over-delegation that erodes your professional judgment. Always validate AI-generated outputs — particularly in healthcare or finance where accuracy matters.
Future Trends to Watch
- Better on-device AI to protect privacy.
- Deeper integrations between calendar, task manager, and communication apps.
- AI that can summarize meetings into action items automatically.
- Integration with Wearables: Smartwatches will use AI to suggest focus breaks based on heart rate.
- Voice-Activated Productivity: AI will schedule tasks and write notes from short voice prompts.
- Cross-Platform Sync: One AI hub connecting calendars, messaging, and project tools seamlessly.
- Emotion-Aware AI: Apps will soon adjust notifications depending on stress levels detected from typing speed or tone.
Pros & Cons Section
Pros of AI Productivity Tools
- Automates repetitive tasks → saves 5–10 hours per week.
- Enhances focus by nudging instead of blocking.
- Provides insights into personal productivity trends.
- Affordable plans → accessible even for students and startups.
Cons to Consider
- Risk of over-dependence → reduces independent problem solving.
- Data privacy risks when integrating accounts.
- Learning curve when setting up automations.
- AI may occasionally generate errors or irrelevant suggestions.
Conclusion
AI tools in 2025 make it possible to reclaim time and improve the quality of your work. By starting small — protecting focus blocks, automating one repetitive task, and adding writing assistance — you’ll get immediate returns. Use AI to remove friction, not replace judgment. The combination of a clear process and the right AI tools will help you consistently work smarter.
FAQs
Q1: Are AI productivity tools expensive?
A: Many offer free tiers or affordable subscriptions. Start with free plans (Grammarly, RescueTime) and upgrade only when the ROI is clear.Q2: Will AI replace my job?
A: No. AI handles repetitive tasks — but human creativity, context, and judgment remain essential.Q3: How do I maintain privacy?
A: Read app privacy policies, favor on-device processing where possible, and separate sensitive accounts from connected automations.Q4: What if I don’t like technology?
AI tools today are designed with simple, mobile-first interfaces. Start with one feature, like smart scheduling, before exploring automation.Q5: Do AI tools work offline?
Some tools (e.g., Notion AI, certain writing assistants) now offer offline functionality. This ensures productivity even without constant internet access.Q6: How do I avoid app overload?
Pick one tool per category (e.g., Motion for scheduling, GrammarlyGO for writing) and stick with it for at least 30 days before adding more.Q7: Which AI tool should I start with if I feel overwhelmed?
Start with scheduling (like Motion or Reclaim AI). It’s the easiest to set up and gives immediate results. Once you see hours freed up in your calendar, you’ll feel more confident exploring automation and writing tools. -
Top Emergency Fund Mistakes to Avoid: Secure Your Finances the Right Way
Emergency Fund Mistakes
Imagine this: your car suddenly breaks down, your child wakes up with a high fever, or you receive an unexpected job termination letter. In moments like these, your financial stability can vanish overnight. If you don’t have an emergency fund, your only options may be to swipe a credit card, borrow from friends, or take out a loan — all of which create long-term stress and That’s how you know you got into one of Emergency Fund Mistakes.
An emergency fund is a dedicated pool of money set aside for unexpected expenses. It’s not for vacations, gadgets, or shopping sales; it’s your safety net when life throws the unexpected your way. Yet, even when people try to build one, they often fall into common traps that weaken the fund’s effectiveness.
According to surveys, nearly 60% of adults worldwide don’t have enough savings FRR to cover even one month of expenses. In the U.S., for example, the Federal Reserve reports that almost 40% of Americans would struggle to cover a $400 emergency without borrowing. These numbers highlight just how critical an emergency fund is — and how common it is for people to underestimate their vulnerability.
Let’s dive into the Emergency Fund Mistakes people make with their emergency funds — and how you can avoid them to secure your finances.
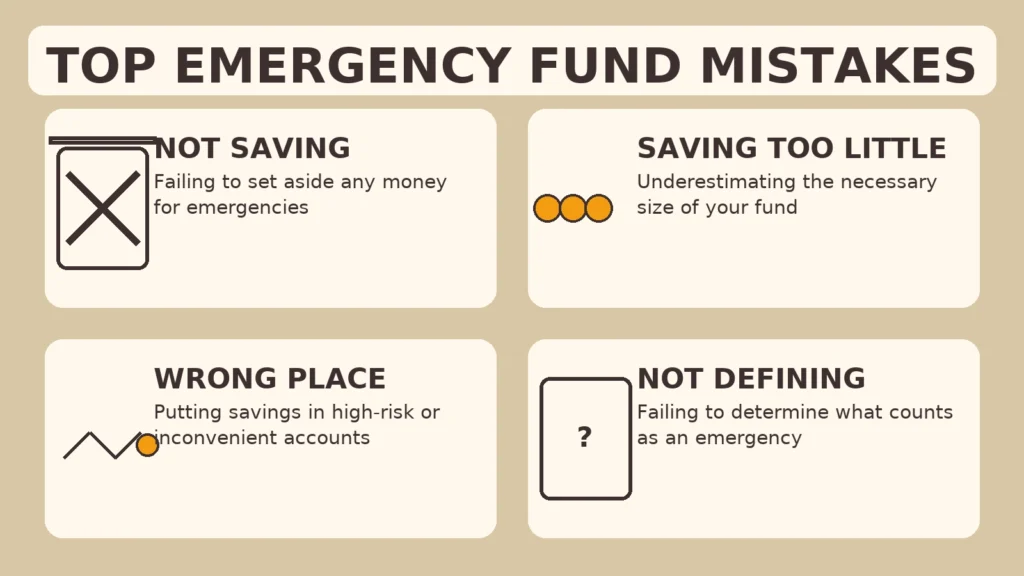
Mistake #1: Not Starting Early Enough
One of The biggest Emergency Fund Mistakes is waiting until life hits you with a crisis. Emergencies don’t wait for “the right time.” Many people postpone saving, thinking they’ll start when they earn more. Unfortunately, that day rarely comes.
- Why it’s harmful: Without a cushion, you’re forced into debt the moment something goes wrong.
- Example: Someone who saves just $20 a week ends up with over $1,000 after a year. It’s small, but it’s a start — and it beats zero.
- Fix: Automate small transfers right after payday. Starting early, even with tiny amounts, builds momentum and financial discipline.
Mistake #2: Saving Too Little
Medical bills, or months without income.
Fix: Calculate your monthly must-haves (rent, utilities, groceries, insurance) and multiply by 3–6 to determine your ideal fund size.
Guideline: Aim for 3–6 months of essential expenses.
Singles: 3 months may be enough if you live alone with low expenses.
Families: With dependents, aim for 6–12 months of expenses for extra security.
Think of it this way: if your rent is $1,200, groceries $400, and other bills $600, that’s $2,200 a month. A three-month fund means $6,600, while six months means $13,200. Seeing the actual math often helps people realize that $500 won’t go very far — it might cover a car repair, but not unemployment. Writing down your “monthly survival number” can help you set a realistic target.
RELEATED : Emergency Fund: Uses and How to Build Yours
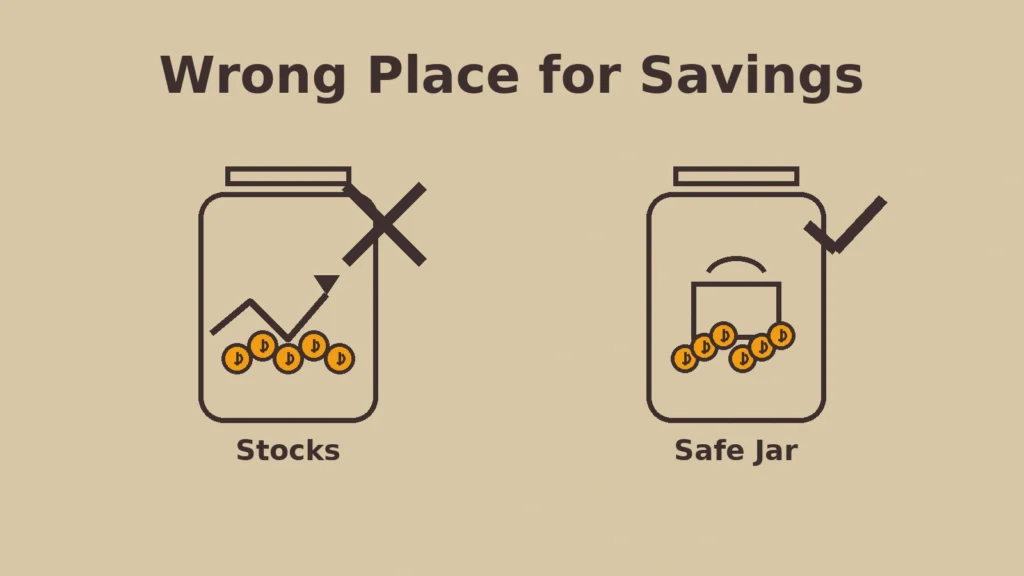
Mistake #3: Keeping Money in the Wrong Place
Where you keep your emergency fund matters just as much as how much you save.
here are options on what to avoid and what’s the best regarding Emergency Fund Mistakes :
- Bad options:
- Under the mattress (unsafe, no growth).
- In a checking account (too tempting to spend).
- In stocks or crypto (too volatile — imagine needing money in a crash).
- Best options:
- High-yield savings account (HYSA): safe, accessible, earns interest.
- Money market account: liquid, conservative, sometimes with higher rates.
Your priority isn’t profit — it’s safety + liquidity.
A good test: ask yourself, “Can I access this money in 24 hours without penalty?” If the answer is no, it’s not the right place for your emergency fund. Many people learned this the hard way during the COVID-19 pandemic when investments lost value right as they needed cash. The safest emergency fund is boring — and that’s the point.
Remember: liquidity and safety > high returns. = no Emergency Fund Mistakes
Emergency Fund Mistake #4: Mixing It With Everyday Spending
When your emergency fund sits in the same account as your grocery money, you’ll end up dipping into it for “minor” expenses.
- Why it’s risky: You’ll deplete your safety net without realizing it.
- Fix: Create a separate savings account just for emergencies. Better yet, keep it at a different bank so you’re not tempted to transfer it impulsively.
Emergency Fund Mistake #5: Not Defining What Counts as an “Emergency”
Without rules, people misuse their fund. Is a wedding an emergency? A holiday sale? The latest phone? Absolutely not.
✔️ Real emergencies: job loss, urgent medical expenses, car breakdown, essential home repair.
❌ Non-emergencies: vacations, shopping, gifts, planned expenses.Tip: Write down your definition of emergencies and share it with your family. That way, everyone is on the same page.
Medical bills for unexpected illnesses (check out our article on Vaccines: A Parent’s Guide for how prevention matters).”
Emergency Fund Mistake #6: Forgetting to Refill It After Use
Using the fund is fine — that’s what it’s there for. The mistake is failing to replenish it afterward.
- Why it matters: Emergencies often come in waves. If you don’t refill the fund, the next crisis could hit harder.
- Fix: Set an automatic transfer to refill the account after you dip into it, just like you’d repay a loan.
Mistake #7: Ignoring Inflation and Lifestyle Changes
The $5,000 fund you built in 2015 won’t cover 2025 expenses. Inflation, kids, rent hikes, and new responsibilities all increase your costs.
- Fix: Review your emergency fund once a year. Adjust the target upward to match your current cost of living.
Mistake #8: Treating It Like an Investment
Some people try to “grow” their emergency fund by investing it in stocks or long-term bonds. That’s dangerous.
- Why it’s wrong: You could lose 30% or more right when you need the money.
- Rule: Emergency money must always be liquid and safe, not speculative. Keep investing separate from your safety net.
The Psychology of Emergency Funds
Why do people fail at saving for emergencies? Often, it’s psychological:
- Optimism bias: “It won’t happen to me.”
- Lifestyle inflation: Spending rises with income, savings don’t.
- Discipline issues: People hate “locking money away” where it’s not exciting.
Fix: Automate savings. Treat it as a bill you pay to your future self.
Behavioural economists call this the present bias — we value immediate rewards (a night out, new gadget) more than future security. One way to overcome it is by “paying yourself first.” Treat your emergency fund contribution like a non-negotiable bill. Another trick is visualization: imagine how calm you’d feel knowing you could handle six months without income. That sense of control is often more motivating than numbers on a spreadsheet.
Pro Tips & Strategies for Success
- Start with a $1,000 mini-goal. It’s manageable and gives instant peace of mind.
- Automate transfers. Out of sight, out of mind.
- Boost with windfalls. Tax refunds, bonuses, or side hustle income = emergency fund fuel.
- Name your account. Label it “Emergency Fund Only” to remind yourself not to touch it.
- Layer it. Have a quick-access portion (bank account) and a secondary cushion (money market).

Emergency Fund Action Framework:
- Week 1: Open a separate savings account and nickname it “Emergency Fund.”
- Month 1–3: Build a $1,000 starter fund. Automate transfers on payday.
- Month 4–12: Increase contributions to reach 3 months of expenses.
- Year 2–3: Expand to 6 months (or more if you have dependents).
- Every Year: Review, adjust for inflation, and reset goals.
Following a structured timeline like this keeps the process less overwhelming and ensures steady progress.
Emergency Fund vs. Other Savings
People often confuse emergency funds with other financial goals:
- Retirement savings: long-term, not liquid. Never touch for emergencies.
- Sinking funds: money for planned expenses (vacations, holidays, new appliances).
- Investments: wealth growth, but too risky for emergencies.
👉 Rule of thumb: If it’s unexpected and urgent, it belongs in the emergency fund.
Another important distinction: insurance vs. emergency funds. Insurance covers specific risks (health, auto, home), but policies often don’t pay immediately and rarely cover everything. Your emergency fund bridges that gap, covering deductibles, delays, or expenses not included in insurance. In other words, insurance and emergency savings work together — not as substitutes.
FAQs About Emergency Funds
FAQs About Emergency Funds
1. How much should I save in my emergency fund?
3–6 months of essential expenses. Families or freelancers may need 6–12 months.2. Where should I keep my emergency fund?
In a high-yield savings or money market account. Avoid risky investments.3. Do I still need one if I have credit cards?
Yes. Credit is debt with interest; an emergency fund is cash without strings attached.4. Should I keep any of it in cash at home?
A small amount ($200–$500) for power outages or banking issues is fine. The bulk should stay in the bank for safety.5. What if I’m a student or on a low income?
Save what you can — even $10 a week matters. Focus on building a starter fund ($500–$1,000) first.6. Can I invest part of my emergency fund for growth?
No. The purpose is liquidity and stability, not returns. Keep investments separate.7. How often should I review it?
Once a year or whenever your lifestyle changes (new baby, higher rent, medical needs).8. Do couples need separate emergency funds?
Not necessarily. A joint fund can cover shared expenses, but couples should agree on the rules for use.9. How should retirees handle emergency funds?
Retirees still need them. Medical bills, home repairs, or sudden family needs can’t always wait for investments to be sold. Keep at least 1–2 years of expenses liquid.10. What if a global crisis hits (like COVID-19)?
This is when longer funds (6–12 months) prove critical. Widespread layoffs and disruptions make larger buffers invaluable.11. Should I invest once my fund is full?
Yes. After securing your emergency fund, direct extra money into retirement accounts or investments where it can grow.
Conclusion
An emergency fund is not about wealth — it’s about peace of mind. By avoiding these mistakes, you’ll create a fund that works when you need it most. Don’t wait until disaster strikes. Start today, even if it’s just $20. Build it step by step, and your future self will thank you.
Remember: financial security isn’t built overnight. It’s a gradual process of consistent saving, smart planning, and avoiding these common mistakes. Every dollar you set aside is a step away from stress and a step toward freedom. The peace of mind an emergency fund brings is priceless — because when life happens, money should be the last thing you worry about.
“Just like establishing routines for better health (see our post on Baby Sleep Training), building financial routines gives long-term peace of mind.”
-

Childhood Vaccines: A Parent’s Guide to Protecting Your Little One
Becoming a parent comes with countless responsibilities, and one of the most important is safeguarding your child’s health. Childhood vaccination for parents is one of the clearest ways to protect children from serious illnesses. Vaccines — or “shots” as we often call them — have been protecting children for decades, saving millions of lives every year.
This article provides a friendly, practical overview of childhood vaccination, helping you separate facts from fears so you can confidently support your child’s well-being.
Why Vaccination Matters?
Children are naturally curious, exploring the world with every touch, crawl, and hug. But this curiosity also exposes them to germs. Vaccines act like tiny practice runs for the immune system. They teach your child’s body how to recognize and fight dangerous infections before they ever come into contact with them.
Without vaccines, illnesses such as measles, whooping cough, or polio could spread rapidly, causing severe complications. Thanks to immunization, many of these once-deadly diseases are now rare — but they haven’t disappeared completely. A simple plane ride or an unvaccinated neighbor could reintroduce them.
How Childhood Vaccination Works in Children’s Bodies
When your child gets a vaccine, a small, harmless piece of the germ — often a protein or a weakened version of the virus — is introduced into their body. This cannot cause the actual disease, but it does spark the immune system to respond.
Understanding childhood vaccination for parents helps make sense of how immunity develops.
The body makes antibodies, which are like custom-built “soldiers” designed to fight that specific germ. Even after the antibodies fade, the immune system keeps a memory of how to defeat the disease. That way, if your child is ever exposed in real life, their body already knows what to do — fighting off the infection quickly and often without symptoms.
This is why children can receive vaccines so early and be fully protected by the time they’re most at risk.
Childhood Vaccination Schedule for Parents Explained
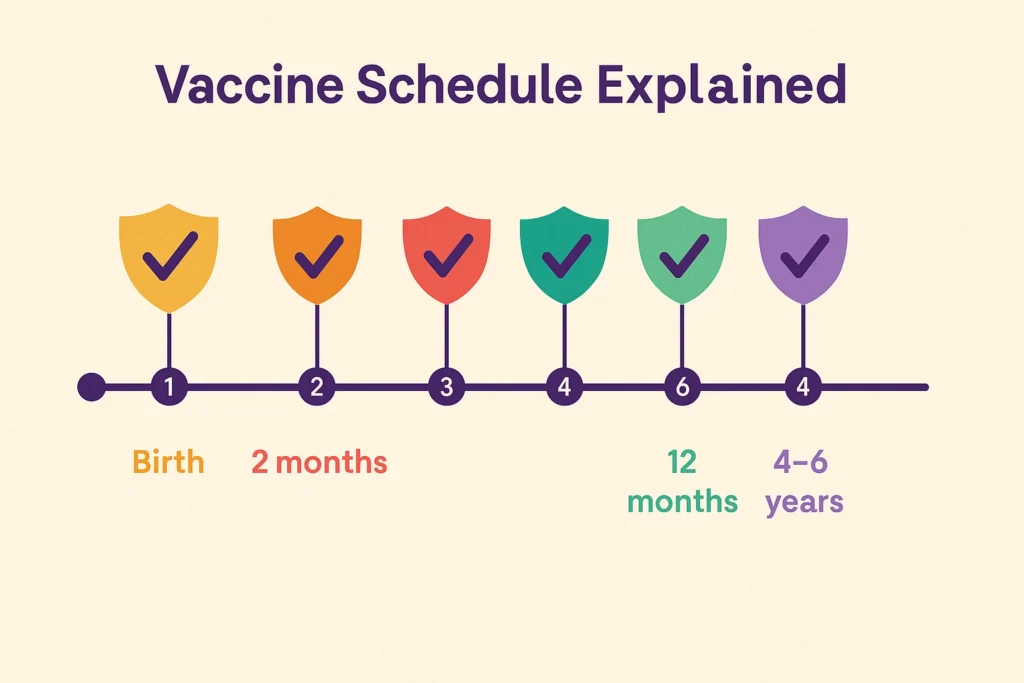
Parents often feel overwhelmed when handed a long chart of recommended vaccines. But understanding the timeline makes it easier:
- At Birth: Hepatitis B (protects the liver from a dangerous virus).
- 2–6 Months: Vaccines against diphtheria, tetanus, whooping cough, polio, Hib, hepatitis B, pneumococcal disease, and rotavirus.
- 12–15 Months: MMR (measles, mumps, rubella), varicella (chickenpox), and boosters of earlier vaccines.
- 4–6 Years: Booster doses before school entry.
- Adolescence: HPV, meningococcal vaccines, and Tdap booster.
Think of the schedule as a carefully designed shield, built layer by layer, giving your child the strongest protection when they’re most vulnerable.
Behind the Scenes: How Vaccines Are Tested for Safety
One of the biggest reassurances for parents is knowing how much effort goes into testing vaccines before they reach your child’s doctor.
- Laboratory and animal studies: Before a vaccine is ever tested in people, scientists study it in labs to confirm it’s safe and triggers an immune response.
- Clinical trials: Vaccines go through at least three phases of trials involving thousands of volunteers — including children — to carefully monitor safety, effectiveness, and side effects.
- Ongoing monitoring: Once approved, vaccines are tracked continuously by health agencies like the WHO, CDC, and FDA. Any unusual reaction is investigated immediately.
This process can take 10–15 years, ensuring vaccines are among the most carefully tested products in medicine.
Common Myths vs. Facts

❌ Myth 1: Vaccines cause autism.
✅ Fact: Decades of research involving millions of children show no link between vaccines and autism. The original study that suggested it was fraudulent and has been fully discredited.❌ Myth 2: Too many vaccines overwhelm a child’s immune system.
✅ Fact: Every day, children naturally encounter thousands of germs. The immune system is more than capable of handling vaccines — in fact, modern vaccines use fewer ingredients than older versions.❌ Myth 3: Natural immunity is better.
✅ Fact: Catching diseases like measles or chickenpox can cause severe complications, hospitalizations, and even death. Vaccines provide safe immunity without the risk of life-threatening illness.
Safety and Side Effects
It’s natural to worry about side effects. Most children experience only mild, temporary reactions like a sore arm, fussiness, or a low-grade fever. These are signs the immune system is learning.
Serious side effects are extremely rare, and health agencies around the world carefully monitor vaccines for safety. If you ever have doubts, your pediatrician can explain what’s normal and when to seek help.
Tips for Parents to Make Vaccination Easier
- Prepare your child gently: Use positive language like “the medicine will help keep you strong.” Avoid words that increase fear (“needle,” “hurt”).
- Bring comfort items: A favorite toy, blanket, or pacifier can calm a baby.
- Distraction works: Singing, blowing bubbles, or playing a short video can help older kids.
- Plan for aftercare: Have children’s acetaminophen ready if advised by your doctor. Cuddles, fluids, and rest usually do the trick.
Practical Tips to Keep Track of Vaccines
Life gets busy, and it’s easy to lose track of vaccine appointments. When it comes to childhood vaccination for parents, staying organized is key.
- Keep the vaccination card handy: Store it with other important documents and bring it to every visit.
- Use reminder apps: Many pediatric clinics offer digital reminders or portals that update automatically.
- Set calendar alerts: Add vaccine dates to your phone or family calendar so you never miss a booster.
- Ask for catch-up plans: If your child misses a shot, doctors can create a safe “catch-up” schedule.
The Bigger Picture: Community Protection
Vaccination doesn’t just protect your child — it safeguards the entire community. Some babies are too young for certain vaccines, and some children with medical conditions can’t be vaccinated. By immunizing your child, you help create “herd immunity,” reducing the spread of disease and protecting the most vulnerable.
Global Success Stories of Vaccines
The real-world impact of vaccines is one of the strongest arguments for their importance:
- Smallpox: Once a devastating disease, it was completely eradicated worldwide in 1980 thanks to vaccination campaigns.
- Polio: Once paralyzing hundreds of thousands of children each year, polio cases have dropped by over 99% worldwide.
- Measles: Global measles deaths have decreased by nearly 80% since the year 2000 because of vaccines.
These stories prove what’s possible when parents everywhere commit to immunization.
What to Do If You’re Unsure
It’s okay to feel uncertain. Instead of turning to social media posts, reach out to trusted sources:
- Your pediatrician or family doctor.
- The World Health Organization (WHO).
- The Centers for Disease Control and Prevention (CDC).
A good doctor will listen to your concerns without judgment and help you find answers.
FAQs About Childhood Vaccination for Parents
Q: Why are so many vaccines given so early in life?
A: Babies are most vulnerable to infections, and their immune systems can respond well to vaccines. Giving them early provides protection during the riskiest years.Q: What if my child misses a vaccine appointment?
A: Don’t panic. Doctors can create a catch-up schedule to get your child back on track without restarting.Q: Can my child still get sick even after being vaccinated?
A: Yes, but usually in a much milder form. For example, a vaccinated child who catches chickenpox may have just a few spots instead of a full-body rash.Q: Are combination vaccines safe?
A: Yes. Vaccines like DTaP (diphtheria, tetanus, pertussis) safely reduce the number of injections while still providing full protection.Q: What about children with allergies or chronic conditions?
A: Most can be vaccinated safely. Pediatricians will adjust the plan if there are specific risks, such as severe egg allergies for certain flu vaccines.Q: Is it safe to get multiple vaccines in one visit?
A: Absolutely. Studies show that children’s immune systems can easily handle multiple vaccines at the same time.Q: What should I do if my child has a reaction?
A: For mild fever or soreness, comfort and fluids are usually enough. For anything severe, call your doctor immediately.Q: How do I talk to family members who are against vaccines?
A: Share reliable resources and speak calmly. Often, showing that you’ve done your research and trust your doctor is persuasive.Q: Are there natural alternatives to vaccines?
A: No natural remedy can replace the immune memory that vaccines provide. Healthy habits are important, but they don’t prevent diseases like measles or polio.Conclusion
Vaccines are a gift of modern medicine — a shield that allows children to grow, play, and dream without the shadow of dangerous diseases. As a parent, you’re not just protecting your child’s present; you’re investing in their future health and the well-being of your community.
Every shot is a step toward a healthier tomorrow.
Related Articles: Child Fever Myths
-

Baby Sleep Training 101: Proven Methods to Help Your Infant Sleep Through the Night
Introduction
For many new parents, the first few months of a baby’s life can feel like one long, sleepless night. Waking every hour, rocking until your arms ache, and wondering if your little one will ever settle into a rhythm—this is a reality most families face. The lack of sleep doesn’t only affect the baby; it impacts the whole household. Parents often struggle with fatigue, stress, and even relationship strain when nights are disrupted, which is why many turn to baby sleep training as a solution.
But here’s the good news: babies can learn how to sleep for longer stretches at night, and parents can guide them through gentle, structured methods known as baby sleep training. Contrary to myths, sleep training is not about letting babies “cry it out” endlessly. It’s about teaching them the skills to self-soothe, fall asleep independently, and stay asleep.
In this guide, we’ll break down the science of infant sleep, share proven sleep training methods, highlight common mistakes to avoid, and answer frequently asked questions. Whether you’re a first-time parent or simply struggling with bedtime routines, this step-by-step approach will give you the tools to help your baby (and yourself) finally rest peacefully.
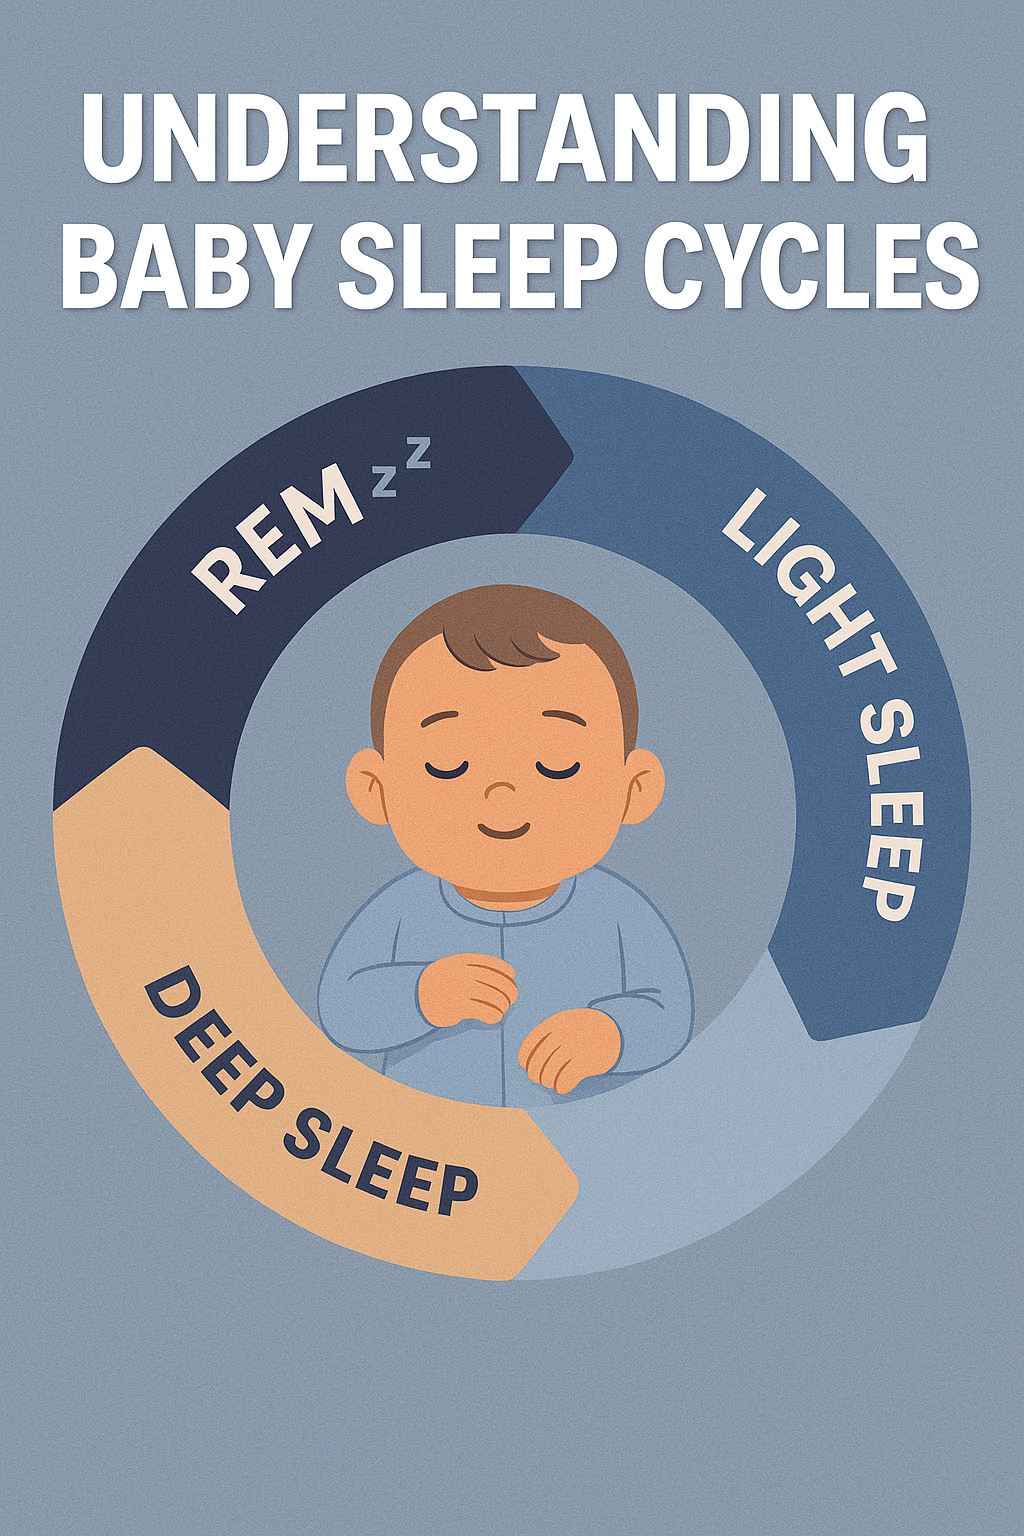
Section 1: Understanding Baby Sleep Cycles
- Babies sleep very differently from adults. While adults typically move through a 90–120-minute sleep cycle, infants have shorter cycles of about 50–60 minutes. This means they wake more frequently, especially during the early months.
Key facts about infant sleep:
- Newborns (0–3 months): Sleep 14–17 hours in total, divided into multiple naps around the clock. They rarely sleep more than 2–3 hours at a time.
- Infants (4–6 months): Begin to consolidate sleep, often needing 12–15 hours in a day, with 2–3 longer naps and stretches of night sleep.
- Older babies (6–12 months): Usually need 11–14 hours of sleep per day, including 1–2 naps.
- Why is this important? Babies spend a larger percentage of their time in REM sleep (light sleep), which is critical for brain development and memory. But it also makes them more prone to waking up at the slightest sound or discomfort.
- Understanding these natural sleep patterns helps parents set realistic expectations and choose the right time to start sleep training.
Section 2: Signs Your Baby Is Ready for Baby Sleep Training
Not all babies are ready for baby sleep training at the same age. While some begin to self-soothe by 3–4 months, others may need more time. Here are the clearest signs your baby might be ready:
- Age range of 4–6 months: At this stage, babies usually no longer need to feed every 2 hours at night, making sleep training more effective.
- Steady growth and weight gain: A healthy weight and consistent pediatric checkups indicate your baby can handle longer stretches of sleep without constant feeding.
- Ability to self-soothe: If your baby sucks their thumb, cuddles a blanket, or finds ways to comfort themselves, they are developmentally ready.
- Parental readiness: Sleep training requires patience and consistency. Parents must feel emotionally prepared to stick to the chosen method.
⚠️ Always consult your pediatrician before starting, especially if your baby was born prematurely or has medical concerns.
Section 3: Proven Baby Sleep Training Methods

There isn’t a “one-size-fits-all” method. The right approach depends on your baby’s temperament and your parenting style. Here are four evidence-based techniques:
1. The Ferber Method (Graduated Extinction)
- Put your baby in the crib awake after bedtime routine.
- If they cry, wait a set time (e.g., 5 minutes) before checking in briefly.
- Each night, increase the wait time (10 minutes, 15 minutes, etc.).
- Gradually, your baby learns to fall asleep on their own.
Pros: Effective in a short period (3–7 days).
Cons: Can be emotionally difficult for parents.
2. The Chair Method
- Sit in a chair next to your baby’s crib until they fall asleep.
- Each night, move the chair further away until you’re out of the room.
- Offers reassurance while encouraging independence.
Pros: Gentler and less crying.
Cons: Takes longer (2–3 weeks).
3. No-Tears Method
- Focuses on comfort: rocking, singing, gentle patting.
- Gradually reduce the amount of soothing over time.
- Works best for sensitive parents who prefer a slow approach.
Pros: Minimal crying, emotionally easier.
Cons: May take months for results.
4. Bedtime Fading
- Track how long it usually takes for your baby to fall asleep.
- Start bedtime slightly later (closer to natural sleep time).
- Gradually shift bedtime earlier while encouraging self-soothing.
Pros: Works with baby’s natural rhythm.
Cons: Requires careful observation and consistency.Section 4: Practical Tips for Success
Regardless of the method you choose, these practical strategies can make sleep training smoother:
- Create a bedtime routine: A warm bath, soft lullaby, and dim lights signal to your baby that bedtime is near.
- Use a consistent sleep environment: Keep the room cool, dark, and quiet. Blackout curtains and white noise machines help minimize distractions.
- Place your baby down drowsy but awake: This teaches them to fall asleep independently instead of relying on rocking or feeding.
- Avoid overstimulation: No screens, bright lights, or rough play within an hour of bedtime.
- Consistency is key: Stick to the same schedule every night. Babies thrive on routine.
Section 5: Common Mistakes to Avoid in Baby Sleep Training

Even with the best intentions, some mistakes can derail progress:
- Starting too early: Before 4 months, babies still need frequent night feeds.
- Inconsistent approach: Switching between methods confuses the baby.
- Overusing sleep props: Rocking, pacifiers, or feeding to sleep can create dependency.
- Ignoring health issues: Conditions like reflux or allergies can disrupt sleep. Always rule these out first.
- Skipping naps: Overtired babies fight sleep more, not less. Maintain consistent daytime naps.
Section 6: Frequently Asked Questions About Baby Sleep Training
Q1: Is baby sleep training harmful for babies?
No. Multiple studies show that when done at the appropriate age, sleep training is safe and does not cause emotional or developmental harm.Q2: How long does baby sleep training take?
Some babies adapt within 3–5 nights using methods like Ferber, while gentler approaches may take several weeks.Q3: What if my baby cries too much?
Crying is expected, but prolonged distress should be addressed. Try gentler methods if crying becomes overwhelming. Always check for hunger, discomfort, or illness first.Q4: Can I sleep train twins?
Yes, but it requires patience. Place them on similar routines but expect small differences in their adjustment.Q5: Does teething or illness disrupt baby sleep training?
Yes, temporary setbacks are normal. Pause training during illness and resume once your baby feels better.Q6: Can I sleep train while breastfeeding?
Absolutely. Night feedings should continue if needed, but focus on feeding for nutrition rather than comfort.Q7: Do I need to stop co-sleeping?
Not necessarily. Some parents use gentle methods while practicing safe co-sleeping, but independent sleep training is easier in a crib.Q8: Can I sleep train while traveling or during holidays?
Travel often disrupts a baby’s routine, but it doesn’t mean you have to pause sleep training entirely. Try to keep the bedtime routine consistent—even if you’re in a new environment. Use familiar items like the same blanket, white noise, or bedtime story. If disruptions happen, restart training once you’re back home.
Q9: What if my partner and I don’t agree on the method?
Consistency is key in sleep training. If one parent applies the method and the other doesn’t, the baby receives mixed signals, which slows progress. Discuss together, agree on a method, and stick to it as a team. Sharing responsibilities during nighttime also reduces stress and builds confidence.
Q10: Does sleep training affect naps during the day?
Yes, naps are part of healthy sleep training. Babies who nap well usually sleep better at night because they aren’t overtired. Establish a nap schedule that matches your baby’s age and aim for naps in the same environment as nighttime sleep. Over time, daytime naps become more predictable and support longer nighttime rest.
Conclusion
Baby sleep training is not about rigid rules—it’s about finding the balance that works for your family. Whether you choose a fast method like Ferber or a gentler one like the Chair Method, consistency and patience are what matter most. Remember that every baby is different, and setbacks are normal.
By establishing a predictable bedtime routine, creating the right sleep environment, and staying committed, you’ll give your baby the tools to develop lifelong healthy sleep habits. More importantly, you’ll regain your own rest and energy, allowing your whole family to thrive.
Related articles : Child Fever Myths
Further Reading
-

5 Best Productivity Apps 2025 | Organize Your Life Smartly
In 2025, productivity is no longer just about checking tasks off a list — it’s about balancing work, personal life, and mental well-being in a world that never slows down. Remote work, digital overload, and constant notifications make it harder than ever to stay focused. That’s where the best productivity apps 2025 come in.
These apps are designed to help you streamline your day, cut distractions, and keep your priorities clear. Whether you’re a student, a busy professional, or simply someone trying to get more out of your day, the right app can transform the way you live and work.
5 Best Productivity Apps 2025 to Organize Your Life
1. Notion – The All-in-One Workspace
Notion is one of the best productivity apps 2025 because it combines so many tools into one. Instead of juggling separate apps for notes, tasks, and planning, Notion gives you a single workspace that can do it all.
Key Features:
- Customizable pages for notes, projects, or journaling
- Task lists and Kanban boards for team collaboration
- Databases for organizing anything from reading lists to expenses
- Templates for quick setup (students, professionals, startups)
Why it Works: Imagine being a student with multiple classes. With Notion, you can track assignments, lecture notes, and deadlines in one hub. For professionals, it becomes a lightweight project manager without the complexity of enterprise software.
Pros: Extremely flexible, powerful free version, endless templates.
Cons: Can feel overwhelming at first due to steep learning curve.
👉 Perfect for: Students, professionals, freelancers, and creatives who want one flexible tool for everything.
2. Todoist – Simple Task Management
Todoist has been around for years, and in 2025 it remains one of the best productivity apps 2025 for managing to-dos. It’s lightweight, intuitive, and keeps you focused on what matters most.
Key Features:
- Quick task creation using natural language (e.g., “meeting tomorrow at 10am”)
- Color-coded priorities for urgent vs. low-priority tasks
- Recurring reminders for bills, weekly habits, or monthly reports
- Integration with Google Calendar, Slack, and email
Why it Works: A busy parent can set recurring reminders for bills and groceries, while a manager can assign tasks to team members. Todoist adapts to simple or advanced needs.
Pros: Clean interface, natural language input, recurring reminders.
Cons: Advanced features locked behind premium version.
👉 Perfect for: Anyone who wants a stress-free way to manage daily and recurring tasks.
3. Google Calendar – Smarter Scheduling
Google Calendar continues to dominate as one of the best productivity apps 2025 for scheduling and time management. While simple on the surface, it’s incredibly powerful when used consistently.
Key Features:
- Automatic syncing across all devices
- Integration with Gmail for instant meeting invites
- Time-blocking to set aside focus hours
- Color-coded calendars (work, personal, family)
- Shared calendars for teams or households
Why it Works: Professionals can block out “deep work” time, parents can share calendars for school events, and freelancers can organize client calls. It’s a tool that everyone already knows—but few use to its full potential.
Pros: Free, integrates with Gmail & other apps, reliable.
Cons: Basic interface, limited customization compared to competitors.
👉 Perfect for: Busy professionals, families, and anyone who needs reliable scheduling.
4. Evernote – Digital Note-Taking
Evernote has been redesigned in recent years, and it still deserves a spot among the best productivity apps 2025. It remains one of the most powerful tools for capturing and organizing information.
Key Features:
- Rich text notes with images, links, and attachments
- Web clipper to save articles and research instantly
- Tags and folders for easy organization
- Sync across desktop, tablet, and mobile devices
- Search function that can even scan text in images
Why it Works: Writers can draft blog posts on the go, researchers can clip and categorize articles, and anyone can use it as a digital “second brain.”
Pros: Excellent for research, powerful search, syncs across devices.
Cons: Free plan is limited, paid plans can be expensive.
👉 Perfect for: Writers, researchers, lifelong learners, and professionals who need organized note storage.
5. Headspace – Mindfulness for Productivity

Headspace is unique on this list of the best productivity apps 2025 because it focuses on mental clarity rather than task management. Productivity isn’t only about doing more; it’s also about staying calm and focused.
Key Features:
- Guided meditations for focus, stress, and sleep
- Breathing exercises to quickly reset during the day
- Focus music playlists for deep work sessions
- Mindfulness reminders integrated into your schedule
Why it Works: A doctor or nurse under stress can take 5 minutes to reset, or a student can use focus music while studying. Headspace ensures your mind stays sharp while your schedule stays busy.
Pros: Great for focus and stress relief, user-friendly, good variety of content.
Cons: Subscription required for full library, not task-oriented.
👉 Perfect for: Anyone who wants balance between productivity and mental well-being.
How to Choose the Best Productivity App for You
With so many apps available, you might be wondering: which one should I actually use? Here are a few tips to help you decide:
- Define your goal → Do you want to manage tasks, notes, or stress?
- Start small → Don’t download all 5 at once. Test one or two first.
- Think integration → Does it connect with the apps you already use (Google, Slack, Outlook)?
- Consider pricing → Some apps are free with upgrades (Notion, Todoist), while others are subscription-based (Headspace, Evernote Premium).
- Stick to it → A productivity app only works if you commit to using it consistently.
Bonus App Section (insert before “Final Thoughts”)
6. Trello – Visual Project Management
Trello is another tool that earns its place among the best productivity apps 2025. Unlike text-heavy task managers, Trello uses boards, lists, and cards to give you a clear, visual way to manage projects.
Key Features:
- Drag-and-drop Kanban boards for tasks and projects
- Collaboration features for teams and families
- Automation tools to reduce repetitive work
- Integration with Google Drive, Slack, and hundreds of apps
Why it Works: Trello is perfect for people who think visually. You can use it to manage work projects, organize a family vacation, or even track personal goals like fitness routines.
👉 Perfect for: Teams, visual learners, and people who prefer a board-style overview.
Final Thoughts
The truth is, productivity isn’t about squeezing more into your day. It’s about making space for what matters most. By using the best productivity apps 2025 — from all-in-one workspaces like Notion to mindfulness apps like Headspace — you can design a routine that supports focus, balance, and efficiency.
No single app will change your life overnight. The real power comes from choosing one or two that fit your lifestyle and sticking with them. Start small, test the features, and commit to using them consistently. Within weeks, you’ll notice a difference in how you manage your time and energy.
So, whether you’re looking to finally get ahead of deadlines, reduce stress, or simply reclaim your free time, these apps can help you work smarter — not harder — in 2025 and beyond.
👉 Related: The 50/30/20 Rule Explained: How to Manage Your Salary Smartly
👉 Outbound: PCMag’s Best Productivity Apps -

Beginner’s Guide to Investing in Mutual Funds: How to Start Step by Step
In today’s world, more people are realizing that simply saving money in a bank account is not enough to build long-term wealth. Inflation eats away at savings, while opportunities for growth exist in the stock and bond markets. But managing individual investments can feel overwhelming—especially for beginners in 2025, when new options like robo-advisors and apps compete for attention.
That’s why mutual funds continue to stand out. They combine professional management, diversification, and affordability, making them one of the most beginner-friendly ways to invest. This beginner’s guide to investing in mutual funds 2025 will break everything down step by step so you can start with confidence.
Beginner’s Guide to Investing in Mutual Funds: What Are They?
A mutual fund is a pool of money collected from many investors, managed by professionals. The fund invests in a mix of assets such as stocks, bonds, and other securities.
Instead of buying a single stock yourself, you buy “shares” of the mutual fund, and the fund manager decides how to distribute the money across different investments.
👉 In simple words: it’s like joining a group project where experts do the hard work of picking investments for you.
Benefits of Investing in Mutual Funds
- One of the main reasons mutual funds are considered among the best beginner investments in 2025 is their simplicity. Let’s break down the key advantages:
- Diversification → Your money is spread across many assets, reducing risk.
- Professional Management → Fund managers analyze the market for you.
- Affordable Entry → Many funds let you start with as little as $100.
- Liquidity → Easy to buy or sell shares when needed.
- Compounding Growth → Reinvested earnings help your wealth grow faster.
Let’s look at a practical example. Imagine investing only in one company’s stock. If that company struggles, your investment takes a big hit. But with mutual funds, diversification spreads your money across dozens—or even hundreds—of companies, reducing risk.
Professional management is another major advantage. Instead of trying to read financial reports or time the market yourself, fund managers handle this for you. Many funds also give you the option to automatically reinvest dividends, which helps accelerate compounding growth.
Finally, entry is affordable. Decades ago, investing in funds often required thousands of dollars. Today, many brokers let you start with as little as $100 or even less if you use automated platforms.
Pros and Cons of Mutual Funds
- Pros: Easy to start, diversified, professionally managed.
- Cons: Fees can be higher than ETFs, no guaranteed returns, not ideal for short-term trading.
Types of Mutual Funds
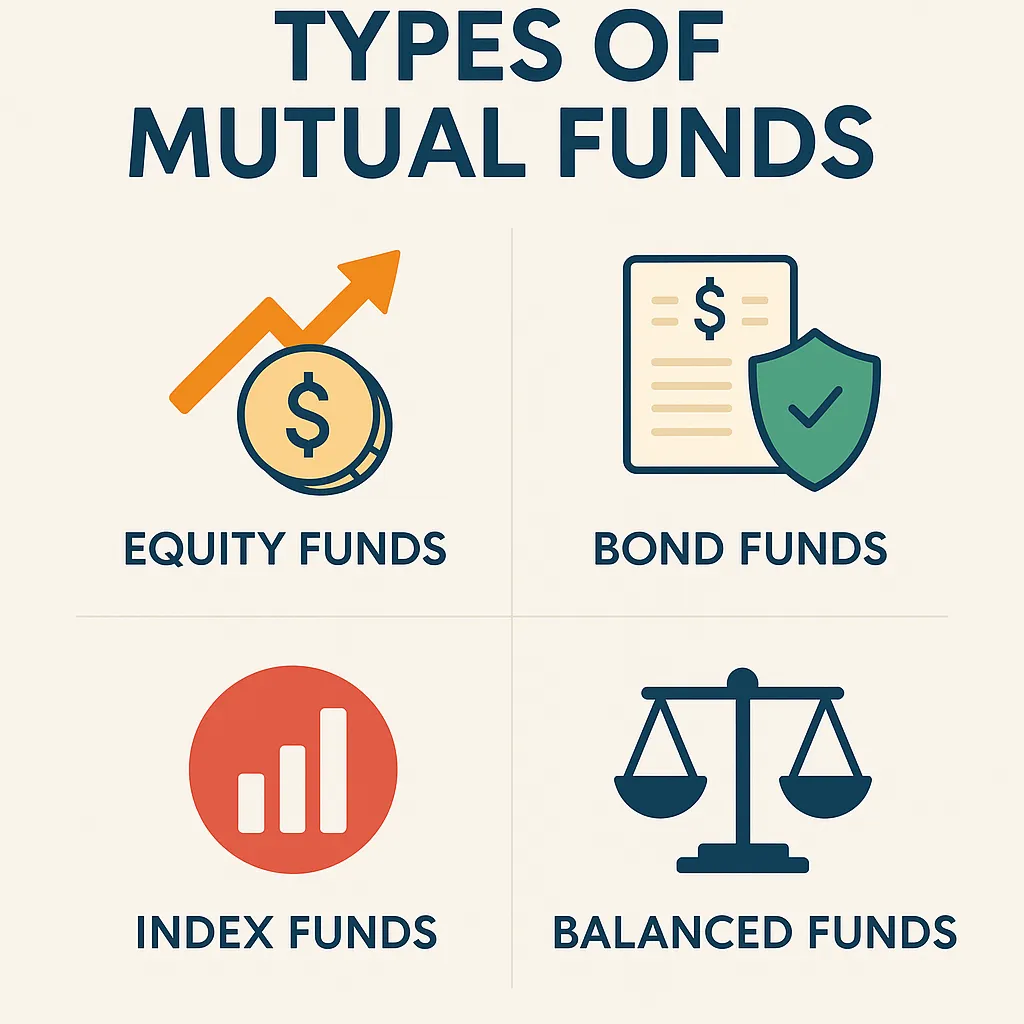
- Not all mutual funds are the same. Here are the main categories every beginner should know:
- Equity Funds → Invest mainly in stocks. Higher risk, but potential for higher returns.
- Example: A U.S. stock market mutual fund.
- Bond Funds → Invest in government or corporate bonds. Lower risk, stable income.
- Example: A government bond fund.
- Index Funds → Track a market index (like the S&P 500) with lower fees.
- Example: Vanguard 500 Index Fund.
- Balanced Funds → Mix of stocks and bonds for stability.
- Example: A 60% stock, 40% bond portfolio.
For beginners, here are some well-known real-world examples:
- Equity Funds: Vanguard Total Stock Market Fund (VTSAX) → covers the entire U.S. stock market.
- Bond Funds: Fidelity U.S. Bond Index Fund (FXNAX) → focuses on stable government and corporate bonds.
- Index Funds: Vanguard 500 Index Fund (VFIAX) → one of the oldest and most trusted.
- Balanced Funds: T. Rowe Price Balanced Fund (RPBAX) → a mix of stocks and bonds for steady growth.
By understanding these categories and examples, you can choose a fund that matches your goals and risk tolerance.
- 👉 See the infographic below for a visual breakdown of the types of mutual funds for beginners.
Beginner’s Guide to Investing in Mutual Funds: How to Start Step by Step
If you’re a beginner wondering how to start investing in mutual funds, these steps will guide you:
- If you’re a beginner wondering how to start investing in mutual funds, these steps will guide you:
- Set a Goal → Are you saving for retirement, a house, or general wealth?
- Choose a Fund Type → Equity for growth, bond for safety, or balanced for both.
- Pick a Trusted Platform → Online brokers, robo-advisors, or your bank.
- Start Small → Even $100–$200 per month adds up over time.
- Stay Consistent → Investing works best long term (think 5–10 years).
Example: Investing $200 Monthly
If you invest $200 per month into a mutual fund with an average annual return of 8%:
- After 5 years, you’d have around $14,700.
- After 10 years, you’d have over $36,000.
- After 20 years, you’d have more than $118,000.
- After 30 years, your account could grow to over $300,000.
This is the power of compounding: the earlier and more consistently you start, the greater the rewards.
Risks of Mutual Funds
- Like all investments, mutual funds carry some risks:
- Market Risk → The value of your investment can go down during market downturns.
- Management Fees → Some funds charge high expense ratios.
- No Guaranteed Returns → Performance depends on the market and the manager.
- Inflation Risk → If inflation rises faster than your fund’s returns, your real purchasing power decreases.
- Manager Risk → Some funds underperform because the manager makes poor decisions. This is why many investors prefer index funds, which track the market instead of relying on active management.
👉 Pro Tip: Always check the fund’s expense ratio (aim for under 1%). Lower fees mean more of your money stays invested.
Who Should Invest in Mutual Funds?
Mutual funds are a great choice for:
- Beginners who want a simple way to start investing.
- Busy professionals who don’t have time to research individual stocks.
- Long-term investors focused on retirement or wealth building.
Mutual funds may not be ideal for:
- Traders seeking short-term gains.
- Investors who dislike paying management fees.
- People who prefer total control over their investments.
Mutual Funds vs ETFs vs Stocks
If you’re still unsure whether mutual funds are right for you, here’s how they compare:
- Mutual Funds → Managed by professionals, great for beginners, but fees can be higher.
- ETFs (Exchange Traded Funds) → Similar to mutual funds but trade like stocks; usually cheaper.
- Individual Stocks → High risk, high reward. Great for advanced investors but risky for beginners.
FAQs About Mutual Funds
1. Can I lose money in mutual funds?
Yes. Mutual funds are tied to the performance of the market. During downturns, your investment value may drop. However, diversification means you’re less exposed than if you held only one or two stocks. Over the long term, markets historically trend upward, which is why many investors stay invested for 10+ years.2. How much money do I need to start?
Some funds require a $1,000 minimum, but many online brokers and robo-advisors allow you to begin with $100 or even less. The important thing is not the starting amount but the habit of consistent investing. Even small monthly contributions can grow significantly over time.3. Are mutual funds better than savings accounts?
For short-term needs (like emergency funds), savings accounts are safer because they don’t lose value. But for long-term goals like retirement, mutual funds usually deliver much higher returns. For example, a savings account might earn 2–3% interest, while mutual funds historically return 6–10% annually.4. How do I know which mutual fund to pick?
Start by considering your goals and timeline. If you want long-term growth, an equity or index fund may be best. If you want stability, a bond or balanced fund might suit you. Always check the fund’s expense ratio (fees) and past performance compared to its benchmark index.Final Thoughts
Mutual funds remain one of the smartest entry points for new investors. They’re simple, affordable, and effective at balancing risk with reward. The key is to align your choice of fund with your financial goals—whether that’s retirement, buying a home, or building general wealth.
As this beginner’s guide to investing in mutual funds 2025 has shown, starting small and staying consistent is the best way to build wealth. Even if you begin with just $100, time and compounding can turn small contributions into significant long-term gains.
The earlier you start, the greater the impact. So don’t wait—take the first step today and let your money work for you.
👉 Related: The 50/30/20 Rule Explained: How to Manage Your Salary Smartly
👉 Further Reading: Morningstar Beginner’s Guide to Mutual Funds -

The 50/30/20 Rule Explained: How to Manage Your Salary Smartly
Managing money can feel overwhelming, especially when your salary has to cover bills, savings, and lifestyle expenses. The truth is, most people don’t fail at money because they earn too little — they fail because they don’t have a clear plan.
That’s where the 50/30/20 rule of budgeting comes in. It’s one of the simplest and most effective methods for managing your salary. Whether you earn $2,000 or $20,000 a month, this framework helps you understand exactly where your money should go.
Imagine this: You get your paycheck on Friday, pay a few bills, grab dinner out, and by the following Thursday you’re already wondering where your money went. This cycle is common, and it’s why so many people feel stuck financially. The 50/30/20 rule gives you a roadmap to break that cycle. Instead of guessing, you’ll know exactly how much to spend, save, and enjoy—every single month.
In this guide, we’ll explain what the 50/30/20 rule is, why it works, how to apply it to your salary, and practical tips to make it stick. By the end, you’ll know how to balance enjoying life today while saving for tomorrow.
What Is the 50/30/20 Rule?
The 50/30/20 rule is a personal finance strategy that divides your after-tax income into three categories:
- 50% Needs: Essential expenses such as rent, utilities, groceries, transportation, and insurance.
- 30% Wants: Lifestyle choices like dining out, shopping, entertainment, or hobbies.
- 20% Savings & Debt Repayment: Emergency fund, investments, retirement savings, and paying off loans.
This balance ensures you cover necessities, enjoy life, and still build long-term financial security.
👉 Think of it as a “money diet” — just like nutrition requires balance between proteins, carbs, and fats, your budget requires balance between needs, wants, and savings.
Why the 50/30/20 Rule Works
The reason this method has stood the test of time is because it’s both practical and psychological. Here’s why:
- Simplicity: With only three categories, you don’t need to track every cup of coffee. Instead of feeling guilty about every little expense, you just make sure your “wants” stay within 30%. Example: If you want to buy new sneakers this month, that’s fine—as long as your wants category allows it.
- Flexibility: The percentages scale with your income. Whether you earn $2,500 or $10,000 per month, the framework adapts. Someone on $2,500 can still apply the rule with smaller numbers, while a high earner can use it to prevent lifestyle inflation.
- Balance: Unlike restrictive budgets that cut out all fun, the 50/30/20 rule recognizes that enjoyment matters. If you love traveling or dining out, you can do it guilt-free as long as it’s within the 30%. That balance keeps you motivated long term.
👉 For a deeper dive, check Investopedia’s 50/30/20 Rule guide.
How to Apply the 50/30/20 Rule to Your Salary

Let’s say your monthly salary is $4,000 (after tax). Here’s how it breaks down:
- 50% Needs = $2,000
- Rent: $1,200
- Groceries: $400
- Utilities & bills: $200
- Transportation: $200
- 30% Wants = $1,200
- Dining out: $500
- Shopping: $400
- Entertainment: $300
- 20% Savings & Debt Repayment = $800
- Emergency fund: $200
- Investments: $400
- Loan repayment: $200
👉 Pro Tip: Automate your savings transfer on payday so you never “forget” to save.
Visual Breakdown
Here’s how the 50/30/20 split looks in a pie chart:
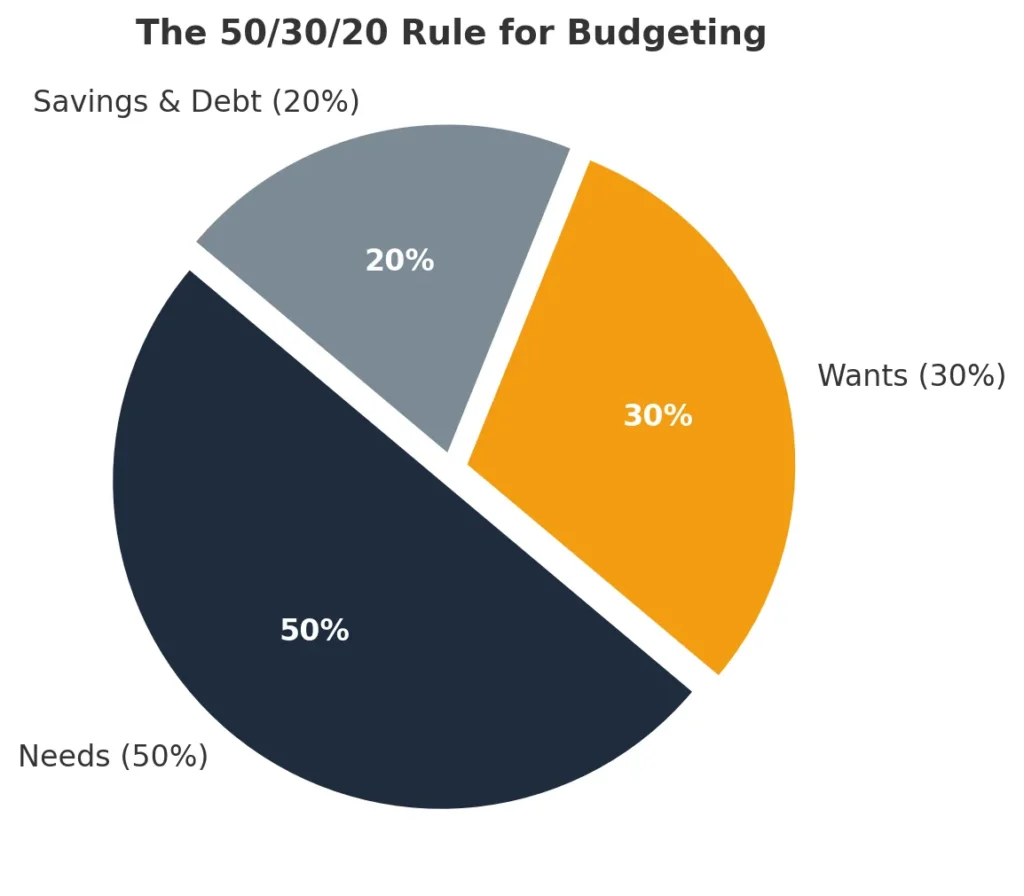
📊 Pie Chart: The 50/30/20 Rule
- Needs = 50% ($2,000)
- Wants = 30% ($1,200)
- Savings/Debt = 20% ($800)
Real-Life Example: $2,500 Salary vs $6,000 Salary
Here’s how the 50/30/20 rule works with different salaries:
- $2,500 Salary → $1,250 needs, $750 wants, $500 savings.
- $4,000 Salary → $2,000 needs, $1,200 wants, $800 savings.
- $6,000 Salary → $3,000 needs, $1,800 wants, $1,200 savings.
- $10,000 Salary → $5,000 needs, $3,000 wants, $2,000 savings.
- At higher incomes, the challenge isn’t survival—it’s lifestyle inflation. Many high earners accidentally let their “wants” balloon, buying luxury items or overspending on vacations. Using the 50/30/20 rule helps them stay disciplined: the more they earn, the more they automatically save, which accelerates wealth building.
👉 Notice how the proportions stay the same, but the actual amounts change. This is why the rule works for almost any income bracket.
Pro Tip: If your rent or housing costs are higher than 50% of income, adjust slightly — cut wants to 20% and put the extra into needs until your situation improves.
Common Mistakes to Avoid
- Confusing Wants with Needs
- This is the most common error. For example, groceries are a need, but dining at a fancy restaurant is a want. A car may be a need for commuting, but upgrading to a luxury vehicle is a want. Mixing the two leads to overspending.
- Overspending on Lifestyle
- Many people allow “wants” to creep up slowly. Streaming services, new gadgets, frequent online shopping—all small amounts that add up. Before you know it, wants exceed 40–50% of your income, leaving little for savings.
- Skipping Savings
- People often think, “I’ll save whatever is left at the end of the month.” The problem? There’s rarely anything left. By prioritizing savings first (20%), you flip the script and guarantee progress toward long-term goals.
- Not Accounting for Debt
- If you have credit card balances or student loans, you may need to adjust the ratio to 40/30/30 (more toward debt and savings). Sticking rigidly to 50/30/20 won’t work if your debt burden is high.
Alternatives to the 50/30/20 Rule
The 50/30/20 rule isn’t the only way to budget. Here are two popular alternatives:
- 70/20/10 Rule: 70% needs, 20% savings, 10% wants. Ideal if you’re repaying heavy debt.
- Zero-Based Budgeting: Every dollar has a job (savings, spending, investing). Great for detail-oriented people.
FAQs About the 50/30/20 Rule
1. Is the 50/30/20 rule realistic for low-income earners?
Yes, but flexibility is key. If essentials like rent and groceries take up more than 50%, reduce your wants category. Even if you can only save 10–15%, that’s better than nothing. The rule is a guide, not a rigid law.2. Can I use this rule if I live in an expensive city?
Absolutely. In cities where rent is very high, many people find their needs take 60%. In that case, you might do 60/20/20 or 60/25/15. The important thing is that you’re still tracking and controlling spending.3. Should savings include retirement contributions?
Yes. Retirement contributions, emergency fund deposits, investments, and debt repayments all belong in the 20% category. If your employer automatically deducts retirement contributions, you can count that as part of your savings.4. How do I actually track spending under this rule?
You don’t need complex spreadsheets. Budgeting apps like YNAB, Mint, or PocketGuard categorize expenses automatically. If you prefer simple tools, even a Google Sheet with three columns (Needs, Wants, Savings) works. The key is consistency, not perfection.5. Can I modify the rule?
Definitely. The 50/30/20 rule is a starting point. If you’re aggressively saving for a house, you could do 50/20/30 (with 30% for savings). If you’re paying off big debts, a 40/30/30 split may make more sense.Final Thoughts
The 50/30/20 rule is more than just numbers—it’s a mindset shift. By giving every dollar a job, you avoid the stress of wondering where your money went each month. The beauty of this method is that it’s simple enough for beginners yet flexible enough to adapt to any stage of life.
If the exact percentages don’t fit your situation, adjust them slightly. What matters most is that you consistently save and keep lifestyle spending under control. Over time, even small percentages add up.
The best part about the 50/30/20 rule is that you don’t have to wait for a perfect moment to begin. You can start with your very next paycheck, even if your savings contribution is small. Over time, the habit of consistent saving and balanced spending matters more than the exact amounts.
So don’t overthink it—set up your categories, automate your savings if possible, and try the rule for three months. You’ll quickly see how much clarity and control it brings to your financial life.
-

7 Common Child Fever Myths Parents Believe 🔥👶
Parents hear a lot of Child Fever Myths. Here’s what a fever really means, when to worry, how to keep kids comfortable, and red flags that need care.
A fever is the body’s alarm—not the fire. It’s a sign the immune system is working. This guide tackles common Child Fever Myths with calm, practical tips you can use tonight. Always follow your clinician’s guidance; this is general information, not personal medical advice.
7 Myths—Busted 💥
1) “Any fever is dangerous.”
Fact: Fever is usually helpful—it’s a normal immune response. Fevers from colds or flu are uncomfortable but rarely harmful on their own.
2) “A higher number means a worse illness.”
Fact: The thermometer number doesn’t equal severity. How your child looks and behaves matters more: breathing, hydration, alertness, and comfort.
3) “If medicine doesn’t bring it to normal, something is wrong.”
Fact: The goal is comfort, not a perfect 37°C. Fevers often fall a little with acetaminophen or ibuprofen, then drift up again as the dose wears off.
4) “You must alternate fever medicines.”
Fact: Alternating isn’t required and can confuse dosing. Using one medicine correctly is usually enough—unless a clinician advises otherwise.
5) “Cool baths or ice packs cure fever.”
Fact: Cooling the skin can cause shivering and distress. Focus on fluids, light clothing, and a comfy room.
6) “No appetite means emergency.”
Fact: Sick kids often eat less. What matters is fluids and urine output. Offer small, frequent sips of water, oral rehydration solution, or breast/formula in infants.
7) “Antibiotics cure fever.”
Fact: Most childhood fevers are viral—antibiotics don’t help. A clinician will decide if a bacterial infection is likely before prescribing.
When to Treat the Fever 😌
Treat if your child is uncomfortable, in pain, or not sleeping/drinking well. Use one of the following if not contraindicated:
- Acetaminophen (paracetamol): follow labeled dosing or clinician advice.
- Ibuprofen: for children ≥6 months; follow labeled dosing or clinician advice.
Give by weight when possible and use the dosing device that comes with the medicine.
Home-Care Checklist ✅
- Fluids often; tiny sips count.
- Light clothes; comfortable room temperature.
- Let them rest; don’t force food.
- Re-check temperature only as needed—watch behavior more than numbers.
- Avoid aspirin in children.
- Never exceed labeled doses or double up on ingredients.
Red Flags — Seek Medical Care Now 🚩
- Age under 3 months with any fever (rectal ≥38.0°C)
- Difficulty breathing, blue lips, severe chest/abdominal pain
- Lethargy, unusual irritability, stiff neck, severe headache, seizure
- Signs of dehydration: very dry mouth, no tears, no urine ≥8 hours, sunken eyes
- Rash that spreads quickly or unexplained bruising
- Fever >3 days, or you’re worried for any reason
Helpful Sources 🔗
For reliable background, see the World Health Organization and the American Academy of Pediatrics.
Disclaimer: This article shares general information—not personal medical advice. Always follow your clinician’s guidance and local protocols.